Let me guess:
You’ve been blogging for a while, and now you want to start an email list.
No, wait…
Maybe you aren’t even thinking about an email list, let alone growing it because your main focus at this moment is to generate income from your blog. Well, I’ve got a secret for you – money is in the list.
If you’re a mom blogger, one of the best things you can have is an email list.
You don’t need a product to sell, and you don’t need a lot of popular services or tools to make cool landing pages or opt-in forms (those are the forms where visitors enter their name and email address and in return, usually get a free resource – that you created).
I know what you’re thinking – having an email list isn’t for you, you’re just a mom blogger! Hold up! Mom bloggers can and should have an email list. Here’s why.
Email Lets You Know Your Audience On a Deeper Level
As a mom blogger, we blog about a variety of things – from home decor to homeschooling to marketing to breastfeeding and more.
We create info-packed posts with beautiful Pin graphics in hopes of someone reading it, commenting and wanting to learn more about us and our blog.
Amiright?
You crave that connection with your readers. You LOVE when you receive a comment, are over the moon when someone shares your content and are surprised when readers email you for advice!
Well, an email list is so much more than all of that. It’s a personal message you give to loyal followers.
When someone gives up his or her email address in exchange to learn more about you, it’s like gold! They are the ones that will tell their followers about you and connect with you.
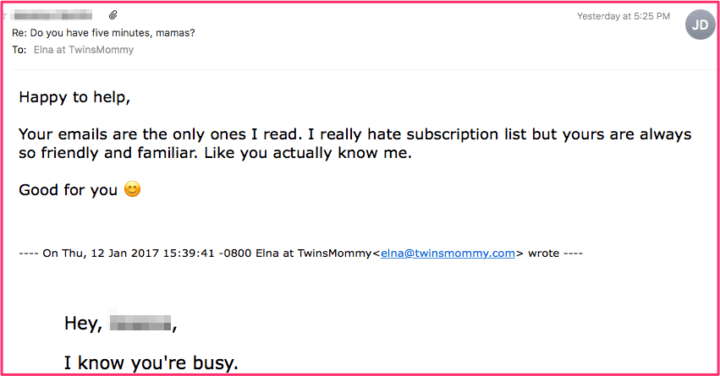
Don’t you want to communicate with your audience on a more personal level? Having an email list does that for you.
Email Trumps Social Media
You own your email list; you don’t own your social media followers. If Pinterest decides to close its doors (heaven no!), then you have no more Pinterest followers. Or worse, if they ban you!!
I almost had an anxiety attack when I COULDN’T LOG INTO PINTEREST last year!!!
Pinterest is currently down on mobile and on web. Don't fret! We're working on getting it fixed ASAP.
— Pinterest (@Pinterest) February 7, 2017
Growing your social media followers is nice and everything – and it can help you grow your brand and credibility – but there is no real connection with your followers. They may not see every time you post, and you can only hope they will see your next posting.
At least with email, you’re in a subscriber’s inbox, and for a lot of bloggers, this is a sacred place.
Only the best of the best are in many blogger’s inboxes. So, when they open and read your email, that’s a small win for you!
Email Converts Better Than Any Other Medium
Are you interested in making some money on your blog?
Maybe it’s with affiliate marketing, or maybe you want to write an eBook or create a course. Whether it’s a digital product or not, stats have proven time and time again that email yields higher conversion rates than social media and other mediums.
Why?
Because email is personal and people sign up to lists for a purpose. And when you are transparent, authentic and personal with your subscribers, they will stay with you and buy from you time and time again.

Do you want to start an email list? You should do it sooner rather than later.
The earlier you can start your list, the better chance you have at monetizing your site successfully and connecting with your subscribers.
The question then becomes, how do I start and grow an email list?
I Grew Out of MailChimp
MailChimp is a great email service provider for new bloggers. Don’t get me wrong. I used MailChimp for years (and I still do for one of my lists). But, at that time, I had a lot of help from my husband and I wanted to find a way to do email marketing on my own.
I found MailChimp limiting at that time.
I wasn’t generating more subscribers because I wasn’t creating a lot of freebies for my visitors.
At times, I also needed tech support from my husband to switch things or move things over.
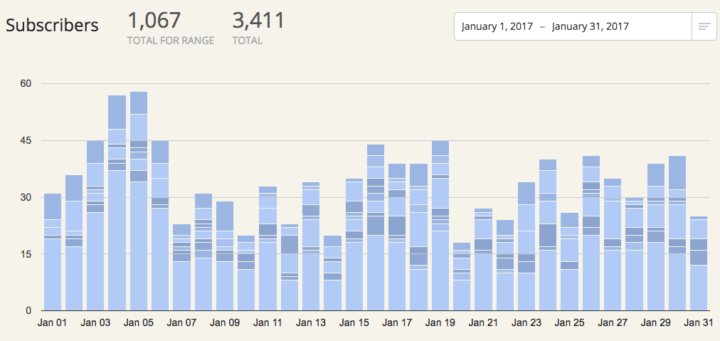
But, once I switched to ConvertKit and was able to use their features, my subscriber rate soared!
My highest day was almost 60 subscribers! Wh-what?
My average also bumped up from 10 to around 25 or so. My big hairy audacious goal for Twins Mommy is to get 10k subscribers. This means I need to scoop up 30 subscribers a day and it looks like I’m hitting this goal! I think that’s incredible – and in only one month of switching!
So, you can see that as soon as I switched to using ConvertKit, I more than doubled my daily subscriber rate.
It’s Easier With ConvertKit
Hold up. Let me give you three big reasons why you should use ConvetKit.
1. You Can Use ConvertKit For Free (Up to 1 Month)
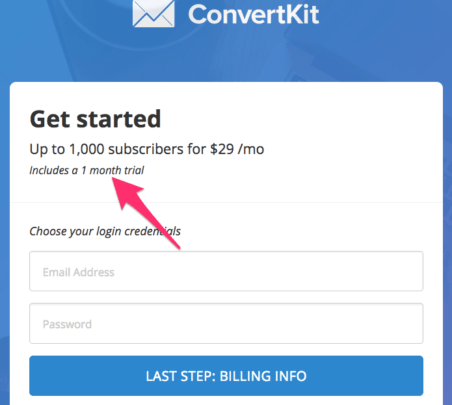
If you use my special ConvertKit link, you are eligible for one month free! Yes (so that’s not bad if you switch email providers. You’re only paying for two accounts for one month instead of two!).
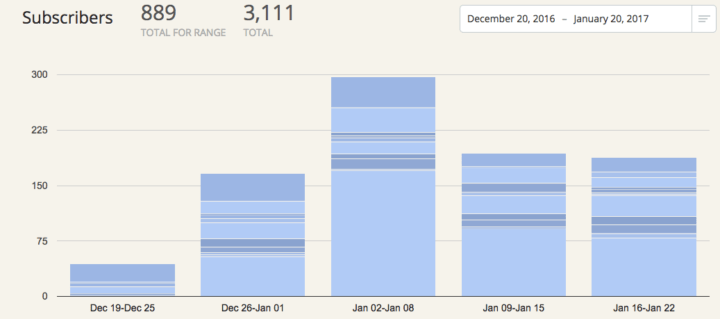
You can start using ConvertKit for an entire month and grow your email list for free! I started using ConvertKit on December 20th. For the next 30 days or so I gained 889 new subscribers!
Imagine how much you can grow your email list using ConvertKit during that one-month free trial? It’s awesome because you can test it out and see for yourself.
Don’t think you can grow your list that fast? Keep reading, because I’ll show you exactly how I grew my list this fast in barely a month.
2. No Tech Involved to Make Your Forms and Landing Pages
Put your nerd girl glasses away – and no more emails or text messages to your web developer – because ConvertKit is a rockstar when it comes to making you a Mom #Boss.
ConvertKit helps turn your mom blog into a mompreneur blog! Aw, snap! Such a profesh feel, right?
There are more awesome features that you get when you sign up to ConvertKit it’s insane:
- Automations are a breeze to do. You set it and forget it.
- You can tag your subscribers (and don’t have to pay for subscribers twice if they sign up for more than one freebie you offer) based on which freebie they signed up to, which landing page they used or any other criteria that can help you categorize your subscribers. This helps nurture your list and provide the BEST value to the right subscriber.
- Super easy to create an email series – they are called sequences in ConvertKit – which is perfect for free email courses or a welcome series to introduce new subscribers to your list.
- Makes segmenting your list easy. You can send newsletters to only a portion of your list just by using tags. For example, I don’t send my weekly newsletters to my subscribers that are in my welcome series.
- You can make an opt-in form, place it in your blog post in minutes. I’ll show you how to do this in a bit.
3. Bonus Feature: Trigger Links

If you’re ready to sell your own product or use affiliate links, ConvertKit makes it easy to set up a trigger links for people that want to still be on your email list, but don’t want to get any of your pitches or launch emails.
Maybe they aren’t interested in the affiliate product you are promoting in your emails. This is a great feature because it reduces your unsubscribe rate and retains your valuable subscribers on your list. And because they opt-out of one launch, that doesn’t mean they will opt-out on another one, so trigger links are a definite win-win.
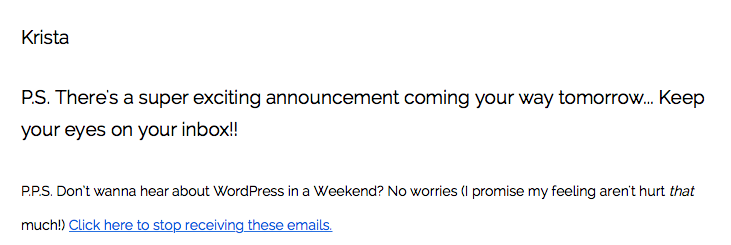
To see it action, here’s what Krista of Blog Beautifully does in her emails:
Personally, the features I mentioned are the ones that really convinced me that ConvertKit was for me. And what was best was that using these features were easy for a non-techie like me. Plus a great added feature for you is you can use ConvertKit completely free for a month!
So, how do I use ConvertKit? Here are the four ways I use ConvertKit to help me grow and nurture my email list.
1. Creating a Form
A form is a sign-up form on your blog so that visitors can sign up and become a subscriber to your list. Usually, these forms can be placed on a sidebar, within a post, at the bottom of your post or as a pop-up.
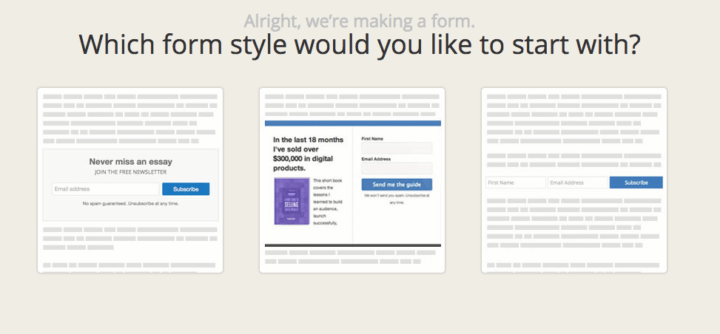
There are three ConvertKit forms to choose from:
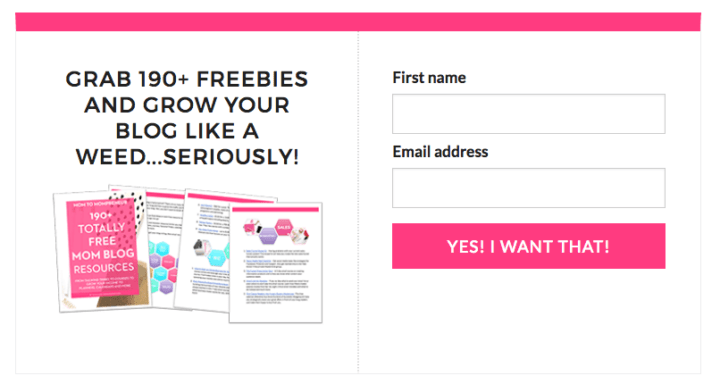
The one I use the most is the middle one. Here is what it looks like on my blog:
It’s fully customizable, which is great since you can make it fit your brand on your blog. Here’s a video tutorial I did showing you how to create a ConvertKit form for your blog post:
2. Creating a Broadcast
ConvertKit calls email newsletters that you send your subscribers broadcasts. It’s up to you how often you want to send broadcasts to your list. I send my list an email once a week.
If you’re not sure what to send your subscribers, check out this post where I give you eight email ideas.
Some features of the Convertkit broadcast are:
- You can easily send a re-send of your broadcast. By “double dipping” you can increase your open rate.
- When setting up your broadcast for the week (or whatever interval you have for your subscribers) ConvertKit makes it a cinch to segment your subscribers. Don’t want your subscribers going through your free course to get your weekly emails? No problem.
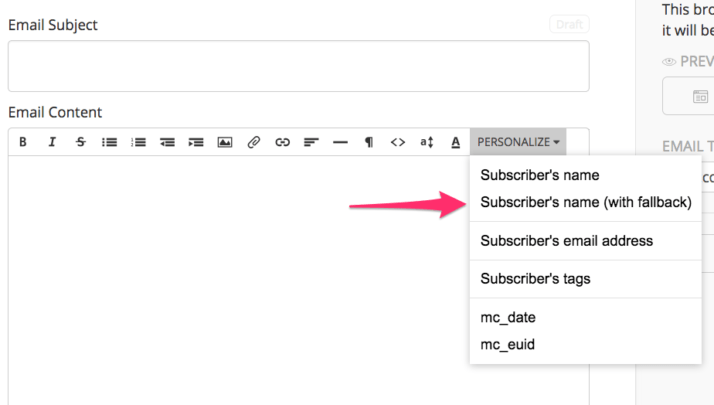
- ConvertKit makes it easy to set up your merge tags. This means you can personalize your broadcast with your subscriber’s name. What’s a bit unique is that it has the option for a fallback message. So, if a subscriber didn’t use their name when they signed up, there’s a fallback message that you can set up (or use ConvertKit’s default fallback message) for those subscribers.
These three features – sending a resend, segmenting my list and using a personal intro – helps me nurture my email list. This makes your subscribers comfortable and enjoy what you are sending.
Your emails no longer are marketing emails to get people to buy; they are personal emails that are given to the right subscriber.
3. Creating a Sequence
A sequence is a series of emails that are automated. This means you don’t have to send out an email each and every time. You create a series of emails to be sent out.
I use ConvertKit’s sequences as a welcome series for new subscribers. It’s a great way to introduce new people to your list about your blog and yourself. You can also set up sequences for a free email course or your sales funnel.
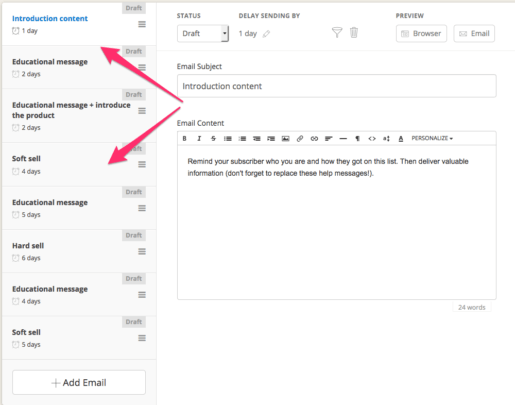
And what’s awesome about ConvertKit is how easy it is to set up a sequence. When setting up your sequence, ConvertKit gives you prompts for each day.
For example, if you have a product and you want to welcome new subscribers and tell them about your product, ConvertKit says that on day 4 of your sequence you should deliver a soft sell and on day 6 to deliver your hard sell.
If you’re new to email marketing, this is a great template for new bloggers with a product or service.
4. Automations and Tags
The heart of using ConvertKit is their easy automations and tagging system.
These two features alone is what can turn your blog into a business. It’s the beginning of email marketing and what can help you monetize your blog, earn more sales and grow a targeted email list.
And what I love about ConvertKit is how logical their automation system is.
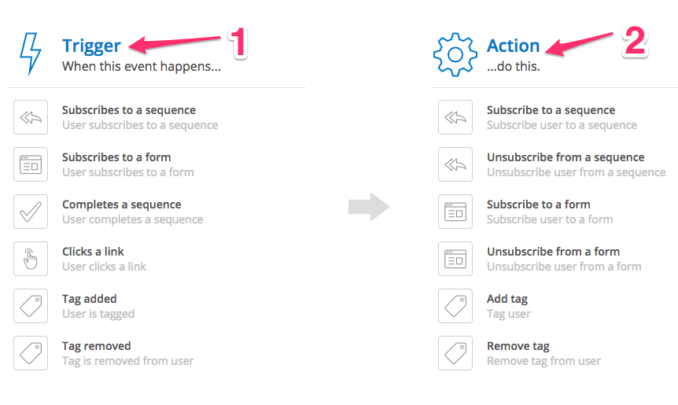
You set a trigger – if a subscriber completes a sequence – and then set the action – the subscriber is tagged. For example, I tag all my subscribers based on how they came into my list.
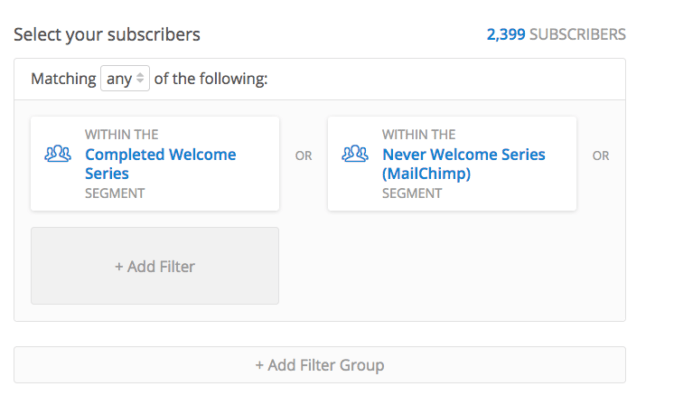
This helps me segment my list so that I can focus on giving them value each time I email them. Here is one automation rule I set up for my list:
This automation rule says that when someone subscribes to my Mom Boss Vault, they are immediately tagged and put in the welcome series. This rule even goes further; when they are finished with the welcome series, they are tagged that they completed the series.
Tagging just helps categorize your subscribers. This helps you keep your list clean and nurtured, something that I LOVE about ConvertKit.
Are You Ready to Kick Butt and Grow Your Email List like a Boss?
ConvertKit can make it happen for you mamas! Their platform is totally easy to use (even for this tech illiterate person), and it’s fast. And for time-starved mamas like myself, this is perfect to help me automate my business growth. And, you can get a month free to try ConvertKit out! Love it!
Tell me in the comments if you’re excited to use ConvertKit!
