Editing Photos like a Pro with Adobe PhotoShop Elements 14

I love taking pictures, but editing them isn’t something most people think about right away. I’ll be the first to say that I think most pictures need to be edited. I prefer to not edit when the lighting is perfect and there’s no one in the shot, but that is the perfect time and place. Not everything is perfect, but with editing programs you can make them perfect! My editing program of choice is Adobe PhotoShop Elements. I just upgraded to Adobe PhotoShop Elements 14 and I’m having tons of fun playing around. I was really excited to upgrade since I purchased a few actions that would only work with 14, nothing lower. I can finally do sky swaps with this! I of course need to learn and I’m so excited to play around.
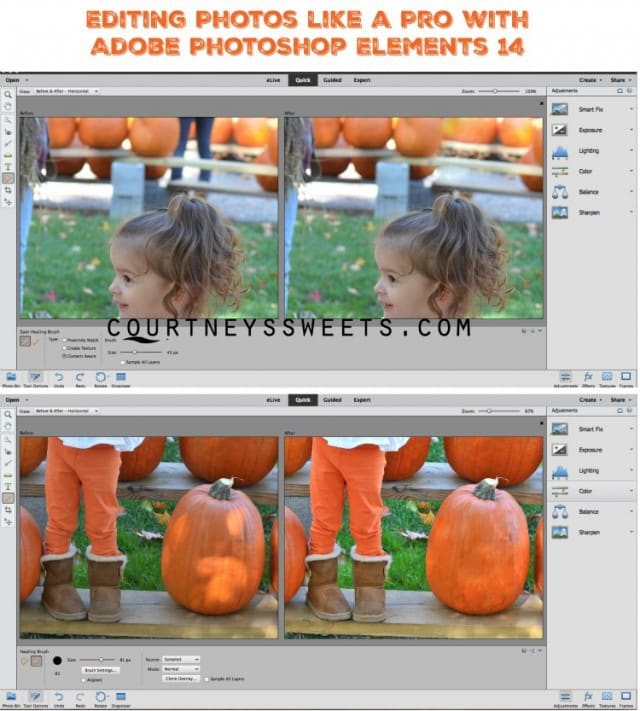
For my tutorial today I wanted to show you how to remove a person as well as harsh lighting from an image. These two things can really impact a photo.

Remove camera shakes, haze or even red eye. Not just for cloning and fixing as I’ve showed. If you’re learning still you can even take advantage of the Guided edits. There’s so much more you can do! We love to organize all of our photos in PSE as well. You can organize by favorite people or search by the location where you were shooting. All I used was the healing brush and spot healing brush. Then I went into the editor and increased the exposure, sharpness, contrast and temperature.
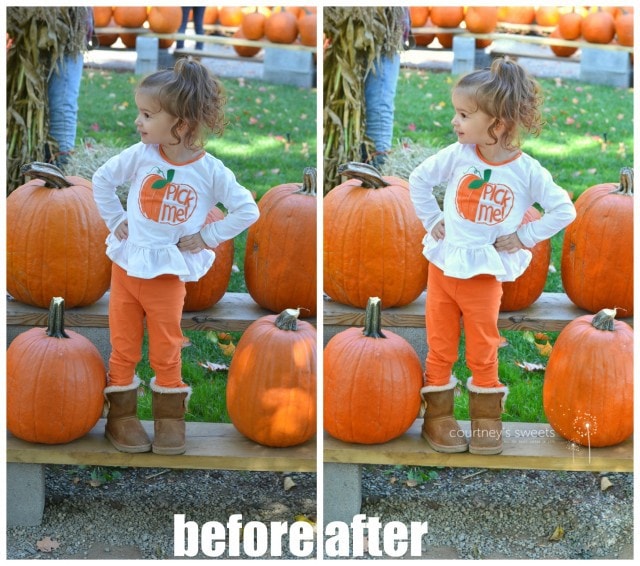
Eventually once you learn the ins and outs of Adobe Photoshop with simple edits you can move on to layers and actions. I have a full post on actions for Photoshop Elements where I share some of my absolute favorites! Note that these actions will only work with Photoshop Elements of Photoshop. I love how we can use Adobe Photoshop Elements 14 to save pictures that would have otherwise been unusable and now print worthy. I’m so excited to dabble with Premier Pro too as I’ve been doing more video on our blog.
The post Editing Photos like a Pro with Adobe PhotoShop Elements 14 appeared first on Courtney's Sweets.